Tattoo Stencil Preparation — How to Prep for Your Consultation

A step-by-step guide to tattoo stencil preparation and artist consultation. Learn how to bring references, prep your skin, and walk out with placement you're confident about.

You’ve picked a tattoo idea, found an artist, and booked the consultation. Now what comes between that appointment and the needle hitting your skin is the most undervalued step in the entire process: stencil preparation.

A well-prepared stencil session saves you from the “I wish I’d moved it two inches to the left” feeling that costs hundreds in laser removal later. A bad one produces a crooked, smeared, or misaligned design that neither you nor your artist noticed until after the first pass.

Let’s walk through exactly how to prep — what to bring, what to ask, and what mistakes to avoid.

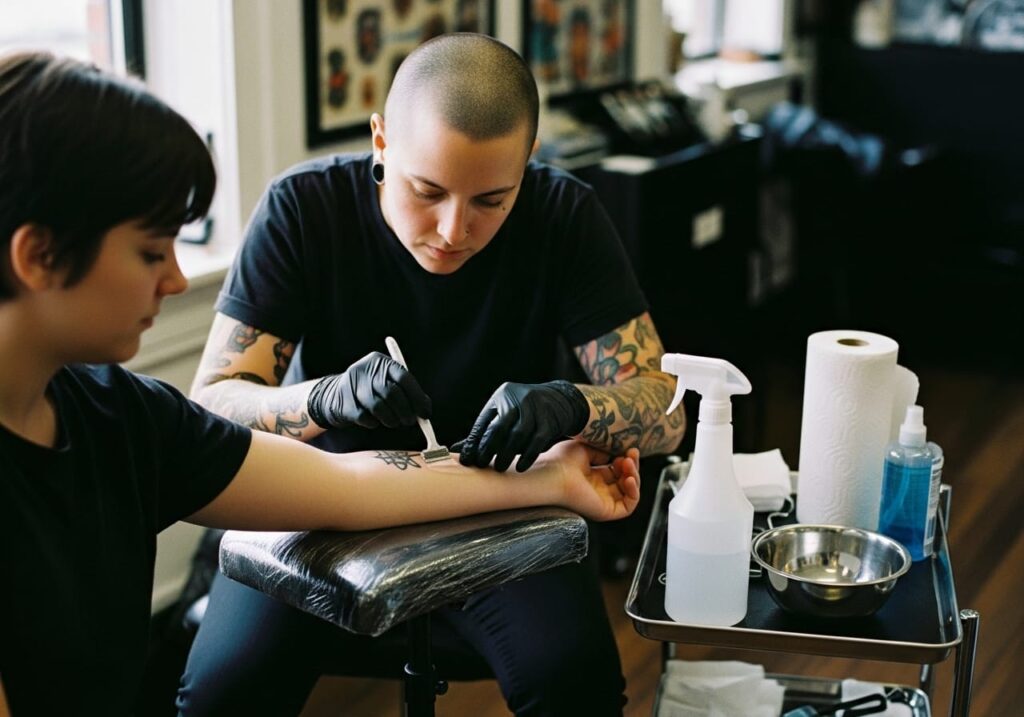
What Actually Happens During Stencil Application

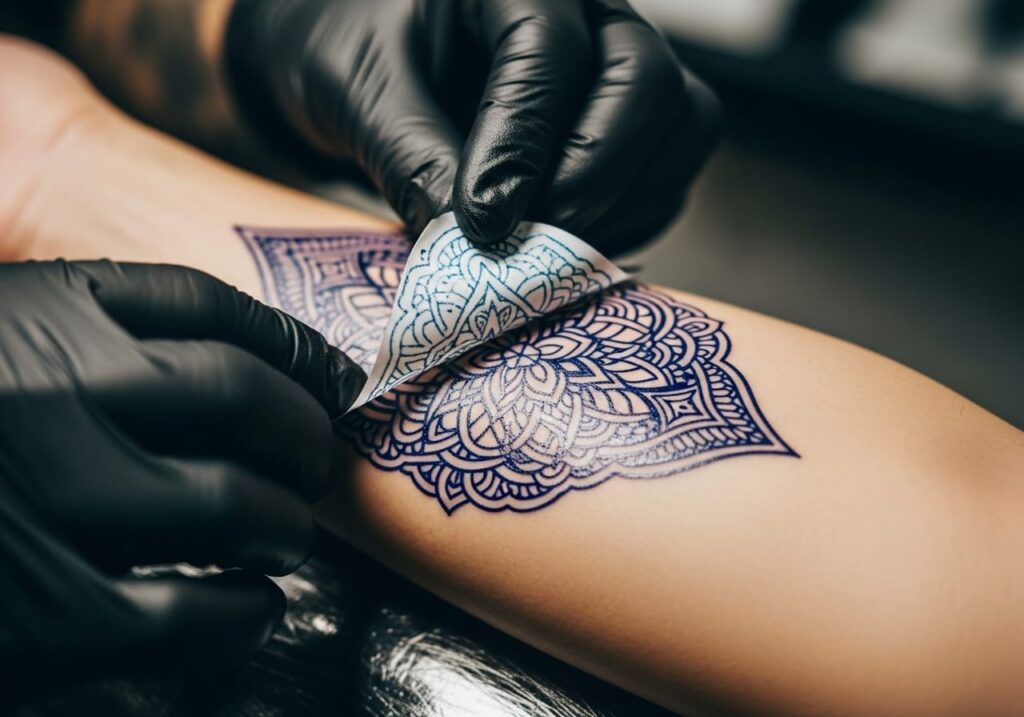
Your artist will shave the area, clean it with alcohol, and apply a thin layer of stencil transfer gel. They’ll press a thermal or carbon-transfer print of your design onto your skin, hold it for 10 to 15 seconds, then peel it off. What’s left is a purple or blue outline — your tattoo’s roadmap.

The entire process takes about 10 minutes. But the decisions made in those 10 minutes determine whether you love or regret the placement for the rest of your life.

Most first-timers don’t realize they have rights during this phase. You are allowed — expected, even — to check the stencil in a mirror, move your body, bend the joint, and request adjustments. Artists who rush this step are a red flag.

How long a stencil lasts on skin

With proper prep, a stencil stays visible for several hours. But sweat, movement, and humidity degrade it fast. If your artist runs behind schedule, you may need a reapplication. Ask upfront how long they typically let the stencil set before starting — minimum 10 to 15 minutes of dry time is standard.

What to Bring to Your Consultation

Your artist can work with almost anything, but some inputs produce better stencils than others.

TypeArtist PreferenceWhy
Transparent PNG (white bg removed)BestFits the stencil printer’s threshold, no background artifacts
Clean JPG with good contrastGoodWorks for most thermal paper if contrast is high
Hand-drawn sketchAcceptableArtist will redigitize; expect extra design fee
Pinterest screenshot with 3 filters appliedWorstLost detail in compression, hard to translate to stencil

Bring 3 to 6 reference images, not one. Mark what you like about each — “the line weight on this one, the shading from this one” — rather than expecting a direct copy. Tattoo artists are not Xerox machines; they redraw your idea in their style so it ages well on skin.

The mirror test

Before signing off on the stencil, stand in front of a full-length mirror. Look at it from 3 to 6 feet away — the distance people will actually see your tattoo. Bend the joint if it’s on an arm or leg. Sit down if it’s on your thigh. A design that looks perfect flat can distort badly when your body moves.

Common Stencil and Placement Mistakes

These five errors show up in tattoo regret forums (r/tattooadvice, r/badtattoos) on a weekly basis:

1. Not moving the stencil before the needle starts. Once the first line goes in, you’re committed. Take the full minute to check.

2. Letting the artist freehand placement. Some artists work freehand for organic shapes like floral or biomechanical designs — that’s fine. For geometric, letters, or symmetrical pieces, you want a transfer stencil. Ask which method they plan to use.

3. Forgetting the design needs to follow the body’s curve. Arm bands that look straight when your arm is flat turn diagonal when you stand. Ask your artist to wrap the stencil around the limb and check the flow with your arm at your side.

4. Choosing placement based on pain level, not visual flow. “I want it here because it hurts less” is how tattoos end up in random spots that fight the body’s natural lines. Pick placement first, then manage pain.

5. Ignoring how the design interacts with existing tattoos. Two adjacent tattoos from different eras with different line weights and shading styles clash visually. Bring photos of your existing ink so the artist can match the approach.

How MyInk’s Try-On Tool Connects to Stencil Prep

Here’s where many people don’t realize they can de-risk the process before ever walking into a shop: use a virtual tattoo preview tool to test placement, scale, and design variations ahead of time.

The MyInk AI Tattoo Generator lets you upload a photo of your body part and preview different design concepts on it. You see how a forearm piece looks at different orientations, how a sternum design interacts with your anatomy, and which motifs sit naturally on curved surfaces. Bring those screenshots to your consultation — your artist gets a clearer brief, and you waste less time guessing.

The Virtual Try-On tool goes further by simulating how a design wraps around specific body parts like arms, ribs, and shoulders. You can test multiple placements in 30 seconds flat, something that traditionally would require multiple shop visits.

Six of the most common reasons people regret their tattoo — wrong size, bad placement, poor orientation, design didn’t match the body part, looked too small from a distance, clashed with skin tone — are directly preventable with a 2-minute preview before you book.

Questions to Ask Before the Stencil Goes On

Walk in with these written down:

  • “How many stencil adjustments do you allow before the session starts?” (Most artists include 2 to 3 repositionings. After that, they may charge a restencil fee.)
  • “Can I see the stencil on my body before you apply it?” (Some artists hold the paper stencil in place so you can preview without the transfer gel.)
  • “Will this placement distort when I gain or lose weight?” (Certain areas — stomach, upper arm, inner thigh — change significantly with body composition shifts.)

Your consultation should answer all three before you sit in the chair.

FAQ

How early should I arrive for my stencil appointment?

Arrive 15 minutes before your scheduled time. This gives you room to fill out paperwork, use the restroom, and settle in without feeling rushed during placement decisions.

Should I moisturize before the appointment?

Moisturize daily for the week leading up to it — tattoo artists need healthy, hydrated skin to get a clean transfer. But on the morning of, apply nothing to the area. Fresh lotion interferes with the stencil gel’s adhesion.

Can I bring my own stencil paper?

You can, but it’s unnecessary. Most shops stock professional-grade thermal or hectograph paper (Spirit, Republic, or Green Soap brands). Ask your artist which paper they use if you’re curious about quality.

What happens if the stencil starts fading mid-session?

Your artist should pause, blot the area, and reapply the stencil on faded lines. A good artist catches this before you do and fixes it proactively.

How much does a stencil reprint cost?

Included in your session deposit (typically $50 to $300). Restenciling due to placement changes usually falls under the same deposit. Full redesigns outside the original scope may incur an additional design fee — clarify this before the session starts.

Video: Tattoo consultation walkthrough covering stencil placement, sizing, and what to ask your artist before the needle starts. Source: YouTube (CC).

Tattoo artist peeling stencil paper off a clean forearm, showing the transferred design outline
Stencil transfer on forearm — the purple outline is your tattoo's roadmap. Source: TattooRail (originally published October 2025). Non-commercial reference, copyright belongs to original author.
Tattoo artist cleaning and shaving a client's forearm before applying stencil
Skin shaving and cleaning before stencil application — a clean surface means a secure transfer. Source: TattooRail (originally published October 2025). Non-commercial reference.

Sources consulted for this guide: AI for Tattoo consultation guide (June 2026), TattooRail stencil tutorial (Oct 2025), TommysSupplies studio workflow guide. These external sources are referenced for research purposes — MyInk’s AI tools complement traditional consultation by letting you preview placement before you walk in.

Design Your Own Tattoo with AI

Turn any idea into a custom tattoo design in seconds. 10 styles, instant preview, free to start.

How to Use an AI Tattoo Preview Before You Book

MyInk is most useful when the output is treated as a planning reference, not a finished tattoo appointment file. Start with the idea you want to test, choose a style that has a real tattoo tradition behind it, then review whether the design can survive on skin at the size and placement you have in mind.

A strong tattoo preview should have one clear subject, readable contrast, and enough negative space for the design to age. Tiny lettering, hairline detail, crowded symbols, soft watercolor edges, and low-contrast color combinations can look beautiful on screen while becoming hard to read after healing and years of sun exposure.

Placement changes the design. A forearm can carry vertical compositions and readable symbols. Ribs and chest placements need more attention to pain, breathing movement, and body curvature. Fingers, hands, and wrists fade faster because the skin moves, washes, and rubs more often. The preview should help you see those tradeoffs before you pay a deposit.

Use the generator to create directions, then narrow to one or two realistic options. Save the prompt, style, placement, and reference image. That record gives your artist a clearer starting point than a folder of unrelated screenshots and helps prevent last-minute design confusion at the consultation.

An artist still needs to redraw, resize, and adapt the concept. Tattooing is not the same as printing an image on skin. Line weight, stencil clarity, needle grouping, skin tone, body movement, and healing all affect the final result. Treat any AI image as a brief for discussion, not a file to copy without judgment.

Be especially careful with memorial, cultural, religious, medical, or partner-name tattoo ideas. Those designs carry meaning beyond aesthetics, so the right workflow includes a pause: check the spelling, symbolism, cultural context, and long-term emotional fit before turning a preview into a permanent mark.

If a page only gives you a pretty image, it has not answered the important question. A useful tattoo planning page should explain who the idea suits, where it works, what might age poorly, what to ask an artist, and when a safer variation would be smarter.

Before booking, compare the design at phone size, full screen, and roughly the real size on your body. If the main shape disappears when small, simplify it. If the design relies on fragile detail, make it larger or choose a bolder style. If the meaning feels unclear, revise the concept before you involve an artist.

Best fit

Early tattoo ideation, style comparison, placement preview, cover-up exploration, memorial concept drafting, and preparing a clearer brief for an artist.

Poor fit

Copying another artist's work, replacing professional stencil preparation, guessing cultural meaning, or choosing a permanent tattoo from a single unreviewed image.

Before using

Check meaning, size, placement, contrast, aging risk, spelling, artist feasibility, and whether the design still feels right after a short waiting period.

Tattoo Planning Checklist

Decide the role of the tattoo first. A decorative piece can be judged by visual strength, fit, and longevity. A memorial or symbolic piece needs a second layer of review: spelling, dates, cultural meaning, emotional timing, and whether the symbol will still feel right when the current life moment has changed.

Check the design at real size. A beautiful full-screen image can fail when reduced to a three-inch wrist tattoo. If the subject, lettering, or secondary symbols become hard to read at actual size, the concept needs fewer details, heavier line weight, more open spacing, or a larger placement.

Compare the style with the body area. Traditional, blackwork, and neo-traditional designs usually tolerate aging better because they use stronger outlines and contrast. Fine-line, watercolor, and tiny geometric pieces can be excellent, but they need careful artist selection, realistic sizing, and acceptance that touch-ups may be part of ownership.

If you are planning a cover-up, be even more conservative. A cover-up has to solve the old tattoo's darkness, shape, and location before it can become a new design. The AI preview can help explore directions, but a cover-up artist must judge what is possible on the existing skin.

Use try-on previews to test placement honestly. Rotate, scale, and compare the idea on the intended body part. A design that looks balanced on a flat screen may distort around elbows, ribs, wrists, shoulders, knees, or fingers. The goal is not a perfect simulation; the goal is catching obvious placement mistakes early.

Before sending anything to an artist, write a short brief: subject, style, placement, approximate size, meaning, colors to use or avoid, and any symbols that must stay out. Add one or two generated references, not twenty. A tight brief gives the artist space to create original work while preserving your intent.

Avoid treating a generated image as proof that a tattoo is safe, culturally appropriate, or technically ready. Ask a professional about stencil clarity, line weight, skin tone, placement movement, and healing. The better the AI-assisted planning, the easier that expert conversation becomes.

If the design still feels right after a short waiting period, the next step is a real consultation. If it stops feeling right, that is a useful result too. The safest tattoo planning workflow helps you avoid weak ideas as much as it helps you find strong ones.

What Makes a Preview Useful

A useful preview answers a specific decision question. On an aging page, the question is whether contrast and line weight will survive. On a meaning page, the question is whether the symbol says the right thing without becoming too crowded. On a cover-up page, the question is whether the new design can realistically hide the old shape. On a pack page, the question is whether the concept is ready for an artist handoff.

The best pages therefore combine image exploration with judgment. They explain what the design is good for, where it may fail, what to ask an artist, and which details should be simplified before the tattoo becomes permanent. This is the difference between browsing tattoo images and actually preparing for a safer appointment.

If the output feels close, do not keep generating randomly. Change one variable at a time: style, placement, size, subject, color, or amount of detail. Comparing focused variations helps you see which part of the idea is strong and which part is creating risk.

A tattoo preview should also make refusal easier. If the design looks wrong on the body, feels too tied to a temporary emotion, depends on detail that will not age, or needs a placement you are not comfortable wearing, stop there. Avoiding the wrong tattoo is a successful planning outcome.

Pack and sample pages should be judged by handoff quality. A useful pack explains the concept, shows the intended style, gives the artist enough context, and leaves room for the artist to redraw instead of forcing a copied AI image. If the handoff would confuse a professional, the design is not ready yet.

Guide pages should help with the questions that sit around the image: what to prepare before a first tattoo, how to think about aftercare, when numbing cream needs artist approval, and how to avoid using pain or urgency as the only decision filter.

Sample pack pages should be especially concrete. They need to show what the buyer receives, how the files support an appointment, what still needs artist review, and when a user should keep refining before purchasing a handoff pack.

When a page helps someone ask a better question before the needle touches skin, it has done real work for both searchers and future clients.

That is why the planning pages emphasize clear briefs, readable designs, realistic sizing, and artist review instead of treating image generation as the final step.

If a sample cannot explain that handoff clearly, it should be revised before purchase.

Clear handoffs reduce appointment friction.

They also reduce revision waste later.